Recipe
Servings
Servings 1×
Ingredients
- Chicken
- Beans
- Potatoes
- Cauliflower
- Asparagus
- Green beans
- Onion
- Garlic
- Lemon
- Mustard
- Feta
- Butter
- Cooking oil
Method
- Let’s be honest: the oven is a commitment.
- Start with bone-in, skin-on chicken thighs.
- Pat the chicken completely dry before it ever touches the pan.
- Place the chicken skin-side down in a hot, heavy skillet: preferably cast iron for its superior heat retention.
- Use waxy potatoes like Yukon Golds; they hold their shape much better than starchy Russets, which can turn into mush when cooked in a one-pot setting.
- Finish the dish by removing the lid for the last few minutes to let any excess moisture evaporate and re-crisp the base of the potatoes.
Let’s be honest: the oven is a commitment. It takes forever to preheat, and by the time your chicken is finally golden, you’ve probably scrolled through three different food apps and considered ordering takeout. But what if you could get that same "roasted" glory, crispy skin, creamy potatoes, and a pan-dripping sauce, entirely on your stovetop in half the time? This skillet version is my absolute go-to for quick family meals that taste like you spent the entire afternoon hovering over a hot stove. It’s simple, it’s soul-satisfying, and yes, it all happens in one single pan.
The Science of the Skillet Sear
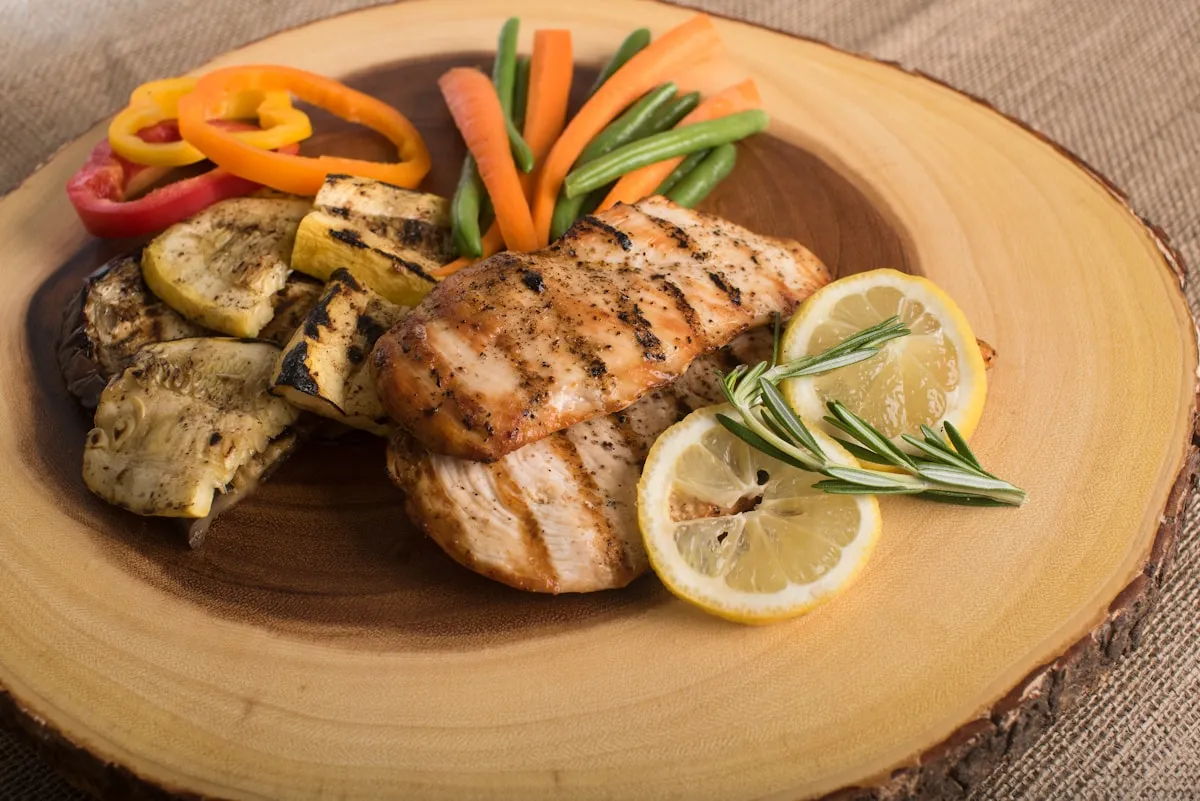
To master this stovetop "roast," you have to understand why we do things in a specific order. It isn't just about making things look pretty; it’s about chemistry. The star of the show here is the Maillard reaction. This is the chemical dance between amino acids and reducing sugars that happens when food hits high heat. It’s what turns pale, rubbery chicken skin into a golden, flavorful crust.
Start with bone-in, skin-on chicken thighs. Thighs are non-negotiable here because they are far more forgiving than breasts. They contain more connective tissue (collagen), which breaks down into silky gelatin during the cooking process, keeping the meat moist even at higher stovetop temperatures. Pat the chicken completely dry before it ever touches the pan. If the surface is wet, the heat will spend its energy evaporating that moisture instead of browning the skin. You’ll end up steaming your meat rather than searing it.
Place the chicken skin-side down in a hot, heavy skillet: preferably cast iron for its superior heat retention. Leave it alone. Resist the urge to poke, prod, or check on it for at least 6 to 8 minutes. When the proteins have properly caramelized, the skin will naturally "release" from the pan. If it’s sticking, it isn't ready. This rendered chicken fat becomes the cooking medium for your potatoes, infusing them with an incredible depth of flavor that oil alone can’t match.
Now, let's talk about the "Potato Paradox." Potatoes need high heat to crisp but gentle heat to become tender inside. By browning them in the rendered chicken fat after you’ve seared the meat, you’re creating a crispy exterior while the interior prepares for the braising stage. Use waxy potatoes like Yukon Golds; they hold their shape much better than starchy Russets, which can turn into mush when cooked in a one-pot setting. If you’re a fan of healthy dinner ideas, using the natural fats from the chicken means you don't need to add excess butter or oil later on.
The final technique is the "Micro-Braise." After browning everything, we add a tiny splash of liquid and cover the pan. This creates a steamy environment that cooks the chicken through to the bone without drying it out. The trick is to use just enough liquid to create steam, but not so much that you submerge those crispy skins. If you’ve enjoyed our spicy one-pot linguine, you know that managing moisture is the secret to a perfect pan sauce. Finish the dish by removing the lid for the last few minutes to let any excess moisture evaporate and re-crisp the base of the potatoes.
Flavor Profiles and Tasty Variations
Once you have the searing technique down, you can pivot the flavor profile to suit whatever is in your pantry. While garlic and rosemary are the classic "Sunday Roast" duo, don't feel boxed in.
- The Mediterranean Twist: Add a tablespoon of dried oregano and a splash of lemon juice during the final braising stage. Toss in some kalamata olives and feta cheese right before serving. The saltiness of the olives cuts through the rich chicken fat beautifully.
- The Smokey Bistro: Swap the rosemary for thyme and add a teaspoon of smoked paprika to your initial seasoning rub. This gives the dish a deep, earthy color and a hint of campfire flavor that feels incredibly cozy.
- The White Wine & Mustard: Deglaze your pan with a splash of dry white wine and a dollop of Dijon mustard before nesting the chicken back in. This creates a sophisticated, slightly acidic sauce that elevates the entire meal.
While many people search for air fryer recipes dinner solutions: like our kielbasa and pierogi roast: this skillet method offers a level of caramelization and pan-sauce development that an air fryer simply can't replicate. It’s the ultimate hybrid of speed and high-end technique.
Perfect Side Dish Pairings
Because this dish is inherently rich with chicken fat, garlic, and herbs, your side dishes should provide a sharp contrast. You want something bright, acidic, or crunchy to cleanse the palate between bites of buttery potato and savory chicken.
A simple arugula salad tossed in a lemon-shallot vinaigrette is my go-to. The peppery bite of the greens and the sharp acidity of the lemon help break down the richness of the pan sauce. Alternatively, consider a side of quick-pickled red onions or a bright slaw. If you want something warm, steamed green beans or asparagus with a squeeze of fresh lemon work wonders. Avoid heavy, creamy sides like mashed cauliflower or cheesy bakes; your potatoes already have the "comfort" category covered. Aim for balance through acidity and freshness.
Frequently Asked Questions
Why is my chicken skin soggy even after searing?
This usually happens for one of two reasons: either you didn't pat the chicken dry enough before searing, or you used too much liquid during the braising phase. When you nestle the chicken back into the pan with the potatoes, the liquid should only reach about halfway up the potatoes. The chicken should sit on top of the potatoes, essentially being steamed from below rather than boiled. Always finish the last five minutes of cooking with the lid off to allow the steam to escape and the skin to firm back up.
Can I use chicken breasts instead of thighs?
You can, but I don't recommend it for this specific one-pot method. Chicken breasts cook much faster and have very little fat. By the time your potatoes are tender, a breast will likely be overcooked and dry. If you must use breasts, cut them into large chunks and add them to the pan halfway through the potato cooking time. However, for the best results in healthy dinner ideas that don't sacrifice texture, stick with the thighs.
My garlic turned brown and tastes bitter. What happened?
Garlic is delicate. If you add minced garlic at the same time you start searing your chicken, it will burn long before the chicken is done. Burnt garlic is acrid and can ruin an entire pan. Always add your minced garlic during the last 60 seconds of browning your potatoes, or even better, add it right before you pour in your braising liquid. This protects the garlic from the direct, intense heat of the pan surface.
Do I need to peel the potatoes?
No! In fact, leaving the skins on helps the potatoes hold their shape and provides an extra layer of texture. Just make sure to scrub them well and dry them thoroughly. The skin also contains a good portion of the potato's fiber, making this a more nutritious choice for your quick family meals.
What is the best pan for this?
A heavy-bottomed skillet is essential. Cast iron is the gold standard because it distributes heat evenly and maintains its temperature when you add cold meat to the pan. If you don't have cast iron, use a heavy stainless steel pan. Avoid thin, non-stick pans for this recipe; they don't allow for the high-level Maillard browning we’re looking for, and the coating can sometimes degrade at the temperatures needed for a proper sear.
{“@type”:”BlogPosting”,”image”:”https://cdn.marblism.com/jvyJmKzIjnQ.webp”,”author”:{“name”:”Penny”,”@type”:”Person”},”@context”:”https://schema.org”,”headline”:”One-Pot Garlic Herb Roasted Chicken and Potatoes”,”publisher”:{“logo”:{“url”:”https://cookpedia.com/logo.png”,”@type”:”ImageObject”},”name”:”Cookpedia”,”@type”:”Organization”},”mainEntity”:[{“name”:”Why is my chicken skin soggy even after searing?”,”@type”:”Question”,”acceptedAnswer”:{“text”:”Soggy skin is usually caused by surface moisture on the chicken before cooking or using too much liquid during the braising phase. Pat the chicken very dry and ensure it sits on top of the potatoes, not submerged in liquid.”,”@type”:”Answer”}},{“name”:”Can I use chicken breasts instead of thighs?”,”@type”:”Question”,”acceptedAnswer”:{“text”:”While possible, breasts dry out easily in one-pot meals. Thighs are recommended because their fat and collagen content keep them moist during the time it takes for potatoes to tenderize.”,”@type”:”Answer”}},{“name”:”How do I prevent my garlic from burning?”,”@type”:”Question”,”acceptedAnswer”:{“text”:”Add minced garlic during the final minute of browning the potatoes or just before adding liquid. This prevents the garlic from being exposed to the high heat of the sear for too long.”,”@type”:”Answer”}}],”description”:”Learn the science behind the perfect stovetop one-pot garlic herb chicken and potatoes. Achieve crispy skin and tender potatoes in half the time of oven roasting.”,”datePublished”:”2026-05-28″,”mainEntityOfPage”:{“@id”:”https://cookpedia.com/one-pot-garlic-herb-chicken-potatoes”,”@type”:”WebPage”}}