Recipe
Servings
Servings 1×
Ingredients
- Chicken
- Quinoa
- Orzo
- Pasta
- Rice
- Bread
- Broccoli
- Asparagus
- Mushrooms
- Spinach
- Greens
- Tomatoes
- Garlic
- Lemon
- Hard cheese
- Feta
- Butter
- Cooking oil
Method
- Use a heavy skillet, like cast iron or a thick-bottomed stainless steel pan, to maintain a consistent temperature.
- Let it sit, undisturbed, until it releases naturally from the pan.
- Use plenty of fresh thyme and perhaps a splash of dry white wine to deglaze the pan.
- Finish the dish with a mountain of fresh basil and some shaved parmesan cheese.
If you are like me, the sight of a mountain of dishes after a long day is enough to make you consider a diet of exclusively cereal. We’ve all been there: trying to balance a healthy lifestyle with a schedule that feels like it was designed by a caffeinated squirrel. This is exactly why I’m obsessed with one pot meals. There is something genuinely therapeutic about watching an entire, sophisticated dinner come together in a single pan. Today, we are diving into a household favorite: the Garlic Herb Chicken and Orzo Skillet. It’s elegant enough for a date night but simple enough to tackle on a Tuesday when your brain is essentially mush.
The Science of the Skillet: Why This Technique Works
Creating a masterpiece in one pan isn't just about throwing things together and hoping for the best; it’s a calculated sequence of events designed to maximize flavor and texture. If you’ve ever wondered why some easy dinner recipes result in soggy pasta and dry meat, it usually comes down to heat management and timing.
The Magic of the Maillard Reaction
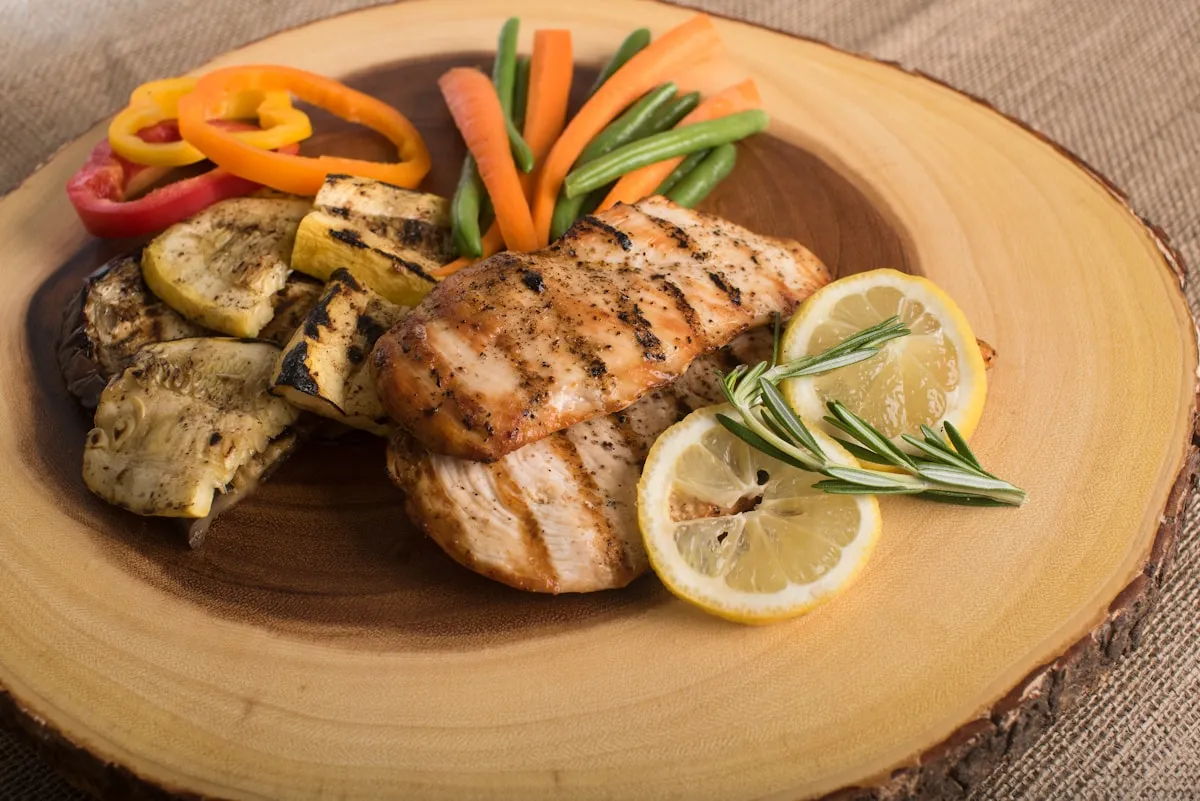
It all starts with the chicken. You want that deep, golden crust that looks like it belongs on a magazine cover. This isn’t just for aesthetics; it’s the Maillard reaction at work. When you sear your protein at high heat, the amino acids and reducing sugars rearrange themselves to create hundreds of different flavor compounds. To achieve this, you must pat your chicken bone-dry. Moisture is the enemy of a good sear. If your chicken is damp, it will steam instead of brown. Use a heavy skillet, like cast iron or a thick-bottomed stainless steel pan, to maintain a consistent temperature. Avoid the temptation to move the meat around. Let it sit, undisturbed, until it releases naturally from the pan. That "crust" is where the soul of the dish lives.
Deglazing the "Fond"
Once you remove the chicken, you’ll notice brown bits stuck to the bottom of the pan. In French cooking, we call this the "fond." This is concentrated flavor gold. When you add your aromatics: specifically garlic and herbs: and then your liquid, you are deglazing the pan. Those bits dissolve into the sauce, ensuring that every grain of orzo tastes like the chicken you just seared. It’s a closed-loop flavor system that makes quick healthy meals taste like they’ve been simmering for hours.
The Art of Toasting Orzo
Orzo is a unique beast. It’s pasta shaped like rice, which means it behaves a bit differently than your standard spaghetti. One of my non-negotiable rules is to toast the dry orzo in the remaining fat (butter or oil) before adding any liquid. This does two things: it adds a nutty, complex depth to the grain, and it creates a slight barrier that prevents the starch from releasing too quickly. If you skip this, your orzo might turn into a gummy, porridge-like mess. By coating each grain in fat, you ensure they stay distinct and "al dente" even as they soak up the broth.
Starch Management and The Rest
Orzo releases starch as it simmers, which naturally thickens the cooking liquid into a creamy sauce without the need for heavy creams or flours. However, this means you need to be precise with your liquid-to-pasta ratio. Think of it like a risotto, but way less high-maintenance. Once the liquid is mostly absorbed, turn off the heat. The most important tip I can give you is to let the pan rest, covered, for at least five minutes. This allows the internal temperature of the chicken to stabilize and the orzo to finish absorbing the residual steam.
Flavor Variations: Shake Up Your Routine
While garlic and herbs are a classic foundation, the beauty of this skillet technique is its versatility. You can easily pivot the flavor profile depending on what’s lingering in your pantry or your mood.
The Greek Goddess Variation
For a bright, Mediterranean twist, stir in some fresh baby spinach and a handful of crumbled feta right at the end. The heat from the orzo will wilt the spinach perfectly, and the feta adds a salty, tangy punch that cuts through the richness of the chicken. A squeeze of fresh lemon juice and some kalamata olives will elevate this to a whole new level. It’s one of those quick healthy meals that feels like a vacation on a plate.
The Earthy Mushroom and Thyme
If you’re craving something more autumnal, sauté sliced cremini or shiitake mushrooms along with your garlic. Use plenty of fresh thyme and perhaps a splash of dry white wine to deglaze the pan. The mushrooms add an umami depth that pairs beautifully with the toasted orzo.
Sun-dried Tomato and Basil
For a more Italian-inspired profile, add chopped sun-dried tomatoes and a tablespoon of tomato paste to the orzo while it’s toasting. Finish the dish with a mountain of fresh basil and some shaved parmesan cheese. The concentrated sweetness of the sun-dried tomatoes provides a wonderful contrast to the savory garlic.
The Perfect Side: Balancing the Plate
Because this skillet is quite hearty and rich, you want a side dish that provides a "palate cleanser" effect. Look for acidity and crunch to balance the creaminess of the pasta.
A bright, crisp green salad is my go-to. Think peppery arugula or a mix of butter lettuce topped with thinly sliced radishes and a sharp lemon vinaigrette. The acidity in the dressing is crucial: it cuts right through the fats and starches, making every bite of the main course feel fresh again. If you're looking for more inspiration, you might enjoy pairing this with a Quick Mediterranean Quinoa Bowl style side salad.
Alternatively, roasted vegetables like asparagus or broccoli are excellent choices. Since the oven is likely free (as this is a stovetop meal), you can toss some greens with olive oil and salt and roast them until the tips are charred and crispy. If you have an air fryer, our Keto Garlic Parmesan Roasted Broccoli is a fantastic companion that won't take up any extra stovetop space.
Frequently Asked Questions (FAQ)
Why did my orzo turn out mushy?
This is the most common heartbreak in the world of one pot meals. Mushy orzo is usually the result of one of two things: overcooking or too much liquid. Remember that orzo continues to cook in its own heat after you turn off the burner. You want to stop when the pasta still has a tiny bit of "bite" (al dente). Also, make sure you aren't using a rolling boil; a gentle simmer is all you need. If you find yourself in a pasta-porridge situation, check your measurements and ensure you are toasting the grains first!
Can I use chicken breasts instead of thighs?
You certainly can, but you have to be careful. Chicken breasts are much leaner and prone to drying out. If you go this route, I recommend searing them to get that nice color, removing them from the pan, and only adding them back in during the last few minutes of the orzo’s simmer time. Thighs are much more forgiving and stay juicy throughout the entire process, which is why they are my top recommendation for easy dinner recipes.
My pan is looking very dry, but the orzo isn't done. What now?
Don't panic! Different pans and different stovetops evaporate liquid at different rates. If the liquid has vanished but the orzo is still crunchy, add more broth or water, about a quarter-cup at a time. Keep the lid on to trap the steam. It’s better to add liquid gradually than to drown the dish from the start.
Can I make this dairy-free?
Absolutely. The creaminess of this dish actually comes from the orzo starch, not necessarily dairy. You can use a high-quality olive oil or a vegan butter substitute for the searing and toasting. If the recipe calls for parmesan at the end, simply swap it for nutritional yeast or leave it out entirely. The garlic and herbs do plenty of heavy lifting in the flavor department.
How do I store and reheat leftovers?
Orzo is like a sponge: it will continue to soak up moisture as it sits in the fridge. When you go to reheat it the next day, it might look like a solid block. To fix this, add a splash of water or chicken broth before microwaving or reheating on the stove. This will loosen the sauce and bring back that silky texture. For more quick meal prep ideas, check out our 15-minute Teriyaki Beef Stir-Fry.
Is it possible to use rice instead of orzo?
While you can use rice, it isn't a direct 1:1 swap. Rice typically requires more liquid and a longer cooking time than orzo. If you want to use rice, I'd suggest looking at a dedicated "arroz con pollo" style recipe or our Quick Chickpea Spinach Stew for similar one-pot rice vibes. If you're in a hurry and need something truly fast, stick with the orzo!
{“@type”:”BlogPosting”,”image”:”https://cdn.marblism.com/OOMEG2JMQ0V.webp”,”author”:{“name”:”Penny”,”@type”:”Person”},”@context”:”https://schema.org”,”headline”:”One-Pot Meals: Garlic Herb Chicken and Orzo Skillet”,”publisher”:{“logo”:{“url”:”https://cookpedia.com/logo.png”,”@type”:”ImageObject”},”name”:”Cookpedia”,”@type”:”Organization”},”description”:”Master the art of the one-pot garlic herb chicken and orzo skillet with expert tips on browning, toasting, and flavor variations.”,”datePublished”:”2026-07-23″,”mainEntityOfPage”:{“@id”:”https://cookpedia.com/one-pot-chicken-orzo-skillet”,”@type”:”WebPage”}}